Helm is a tool used to deploy applications in Kubernetes cluster. In this article, I am going to introduce Helm, how to install it in Ubuntu and example on how to deploy it in Kubernetes. I am gonna use nginx image.
Installation
Install pre-requisites
sudo apt-get install curl gpg apt-transport-https --yesInstall Helm GPG key
curl https://baltocdn.com/helm/signing.asc | gpg --dearmor | sudo tee /usr/share/keyrings/helm.gpg > /dev/nullAdd Helm repository
echo "deb [arch=$(dpkg --print-architecture) signed-by=/usr/share/keyrings/helm.gpg] https://baltocdn.com/helm/stable/debian/ all main" | sudo tee /etc/apt/sources.list.d/helm-stable-debian.listUpdate and install
sudo apt-get update
sudo apt-get install helm
After installation is complete, we can check
helm versionNow, you can use helm to create an application
helm create application-nameConfiguration
After installation, lets start creating an application where I am gonna deploy nginx.
helm create my-helm-applicationThis creates lots of files in the folder “my-helm-application”. Lets open this folder using VSCode.
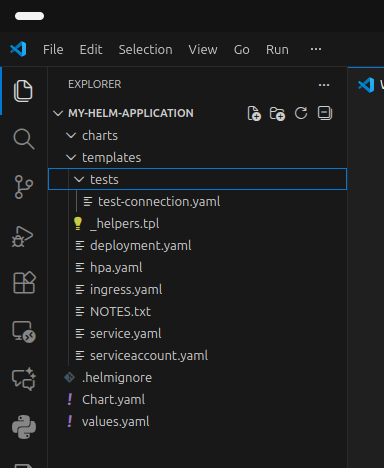
To make it simple, lets keep only deployment.yaml, service.yaml, Chart.yaml and values.yaml files and delete all others.
So, lets change the values.yaml file with the following content
#values.yaml
replicaCount: 2

image:
  repository: nginx
  tag: latest
  pullPolicy: IfNotPresent

service:
  name: nginx-service
  type: ClusterIP
  port: 80
  targetPort: 80
So, now we change the deployment.yaml file with the following. In this file we can use the variables defined in the file values.yaml.
# deployment.yaml
apiVersion: apps/v1
kind: Deployment
metadata:
  name: {{ .Chart.Name }}-deployment
  labels:
    app: {{ .Chart.Name }}
spec:
  replicas: {{ .Values.replicaCount }}
  selector:
    matchLabels:
      app: {{ .Chart.Name }}
  template:
    metadata:
      labels:
        app: {{ .Chart.Name }}
    spec:
      containers:
      - name: nginx
        image: {{ .Values.image.repository }}:{{ .Values.image.tag }}
        imagePullPolicy: {{ .Values.image.pullPolicy }}
        ports:
        - containerPort: {{ .Values.service.port }}
          name: http
          protocol: TCP
The service.yaml file looks like this:
# service.yaml
apiVersion: v1
kind: Service
metadata:
  name: {{ .Values.service.name }}
  labels:
    app: {{ .Chart.Name }}
spec:
  type: {{ .Values.service.type }}
  ports:
  - port: {{ .Values.service.port }}
    targetPort: {{ .Values.service.targetPort }}
    protocol: TCP
    name: {{ .Values.service.name }}
  selector:
    app: {{ .Chart.Name }}
That’s it! We don’t change Chart.yaml file.
Creating Cluster
We need to deploy this into a Kubernetes cluster. So, lets install cluster in the local machine and test it. I am preferring k3d from Rancher, it is lightweight and good for testing. (k3s is also there, which directly installs in the host machine, but I preferred container based clean installation).
So, lets install k3d
curl -s https://raw.githubusercontent.com/k3d-io/k3d/main/install.sh | bashLets create a cluster now, so any request on port 8080 in local machine will be redirected to port 80 inside the cluster.
k3d cluster create my-test -p "8848:80@loadbalancer"Testing
kubectl get nodes
Deployment
Lets deploy helm into this cluster!!!
To deploy the application in Kubernets Cluster we just created, we need to know a couple of Helm commands:
helm install [name] .

helm uninstall [name] .

helm upgrade --install [name] .
So, the application is running in the cluster now. But how can it be accesses, I mean, we should be accessible from outside world. For that, we have configured to forward the traffic with port 8848 into 80. Because, k3s is using traefik as default load balancer. That means traefik should know where to forward the incoming traffic.
Therefore, we need to configure ingress, and define rules there, so that the reserve proxy will be aware which port to be served by which service.
Ingress Configuration(Load Balancing)
So, lets update values.yaml as follows:
# values.yaml
replicaCount: 2

image:
  repository: nginx
  tag: latest
  pullPolicy: IfNotPresent

service:
  name: nginx-service
  type: ClusterIP
  port: 80
  targetPort: 80

ingress:
  enabled: true
  className: traefik
  host: ""
We need to create a new file called ingress.yaml in templates.
#ingress.yaml
{{- if .Values.ingress.enabled -}}
apiVersion: networking.k8s.io/v1
kind: Ingress
metadata:
  name: {{ .Chart.Name }}-ingress
  annotations:
    # This annotation prevents 404s on some setups by stripping the path
    traefik.ingress.kubernetes.io/router.entrypoints: web
spec:
  ingressClassName: {{ .Values.ingress.className }}
  rules:
    - host: {{ .Values.ingress.host }}
      http:
        paths:
          - path: /
            pathType: Prefix
            backend:
              service:
                name: {{ .Values.service.name }}
                port:
                  number: {{ .Values.service.port }}
{{- end }}
After upgrade, we can check the endpoints
kubectl get endpoints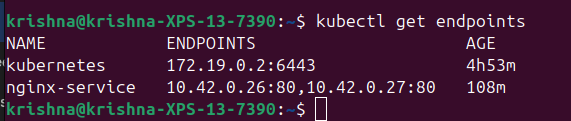
Also we can see the ingress info
kubectl get ingress
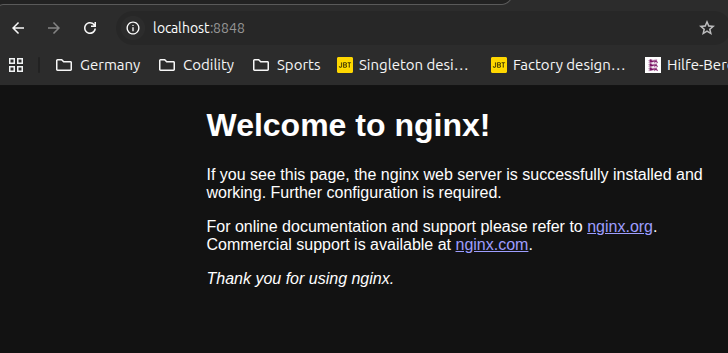
So, we can access the nginx running in port 80 externally from localhost using the following link:
http://localhost:88488080 -> 80->traefik->80(node, where service is running)->80(container)